
Applying an SSL Certiificate to your MikroTik HotSpot
When a guest logs in to your Fydelia splash page, Fydelia will submit the login form back to the MikroTik hotspot. Therefore, if you’re using Fydelia with the secure HTTPS protocol (this is default and recommended), it is essential to ensure that the hotspot has a valid SSL certificate.
If you do not have a valid SSL certificate, the guest will receive security warnings when submitting the form.
STEP 1: Upload your cert files
- Obtain the cert install script from support@fydelia.com and execute.
- Check that the certificate exists in System->Certificates

Now import the key file
STEP 2: Assign the certificate to the www-ssl service
Using “New Terminal”, run this command to assign your certificate to the www-ssl servce. Note that we’re continuing with the name of the file used above: “Hotspot”
/ip service set www-ssl certificate=FydeliaCert disabled=no
In the certificates list you should see “KT” next to your certificate.
FAQ: What does certificate status KT mean? K=Private Key, T=Trusted
STEP 3: Assign the certificate to your HotSpot
The final step is to instruct MikroTik to use this certificate in your HotSpot
Go to IP->Hotspot
Click the Server Profiles Tab
Click Login and set the corresponding options:
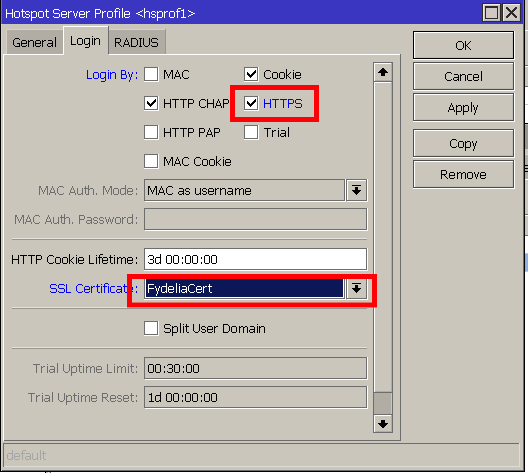
(in this screenshot we used a certificate named “login.fydelia.com”)
IMPORTANT: Setting HTTPS Redirect is essential, since it will ensure that non HTTP requests are immediately redirected to secure HTTPS. Failure to set this option will result in errors such as:
“The network you are trying to join has security issues. For example, the login page might not belong to the organisation shown. Continue anyway.”
Click Apply and OK